↓
 

StudioMicZone

Microphones and Recording Techniques for Small and Home Studios.

Studio Mic Zone - Microphone and recording techniques for small and home studios.
  • Home
  • Terms of Use
  • Privacy
  • Contact Us
  • About StudioMicZone
  • About the Blogger

Tag Archives: Microphone

It’s About the Music (Not the Equipment)

StudioMicZone

There are no "Magic Microphones".

My friend, Bill,  had a problem with his guitar amp and since I had a tube tester, I told him to bring it over, and I would test the tubes, and hopefully be able to get it working again. We got to talking about how some people upgrade the tubes, replace the capacitors and tweak everything to get the “perfect” sound. Then he said, “All they do is mess with the equipment, but never play any music.” It’s about the music. It’s about the music.

Now, some people are into recording because they love working on equipment and the recording part is almost incidental. I get that, and it’s perfectly OK, as long as it’s not an excuse to avoid the hard work of producing something creative and of lasting value.

Equipment is only a means to an end, and what matters most is the creative process and the end result.

A high-end German microphone is not going to fix a voice that needs training and practice.

More plug-ins, better preamps and whatever other equipment you lust after is not going to make up for inexperienced engineering and failure to spend lots of time learning your craft.

More effects and more tracks cannot fix a poorly arranged song.

I have a friend, Paul, who plays upright bass in a trio with two guitar players. They all sing. They needed a demo and were going to come into the studio, but we had trouble scheduling a time. They finally decided that since they were producing a demo to get more work,  a mono demo would be adequate and they decided to record with a single mike. They spent their time balancing their mix and making it sound good in that one mike. I’m sure they’ll have a more than acceptable demo, and they probably honed their performance techniques a bit in that process. It’s about the music. The people who are booking them for a live gig really don’t care about how their demo was recorded or what mike they used.

If you are just learning guitar, you don’t need a $10,000 classic Martin. A $200 beginning guitar will work just fine. And remember, a guitar player who has been honing his craft for 30 years is going to produce some fantastic music out of that $200 beginner’s  guitar, and a 2nd-year guitar student on a $10,000 Martin is still going to sound like a beginner.

So, it’s really about balance. Find some good music and musicians to record, learn your craft well, and then worry about the fine points of the equipment. We are at a unique place in the evolution of recording technology in that professional quality recording equipment is available at such a low price point that equipment purchase is no longer a large barrier to building a small or home studio. However, just because the gear is capable of great results doesn’t make those results automatic. Like mastering any instrument, learning how to produce good recordings takes lots of practice and time. Purchasing better equipment is no short cut to the process, any more than acquiring a Steinway is going to instantly make you an accomplished pianist.

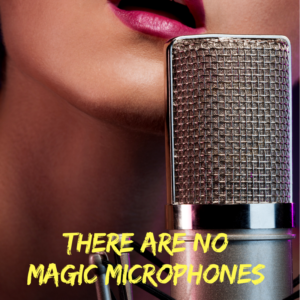
So, don’t worry too much about that classic German microphone at the beginning. Once you’ve honed your craft for a while, getting better preamps and microphones will be another incremental step in improving your product. No “magic microphone” is going to let you skip the years of learning and practicing.


Posted in Choosing & Buying Microphones, Miking Techniques and Recording, Mixing | Tagged Microphone, Pre-Amplifier

Electro-Voice 726 Cardyne I Microphone

StudioMicZone
Electro-Voice 726 Cardyne 1 Microphone

Electro-Voice 726 Cardyne 1 Microphone

I’ve had this Electro-Voice mike in my collection for a number of years, but never bothered to test it since it had an Amphenol MC-3 connector on it and I didn’t have the proper cable. But, I acquired a box of Amphenol connectors recently, so I thought it was time to check out this classic mike.

This is a large microphone, comparable in size to my Shure 556 “fat-boy, Elvis” microphone. It weighs in at about 2 ½ pounds. The best I can tell, it first appeared on the market in the late 1940s.

According to the EV spec sheet:

The CARDYNE microphones are cardioid unidirectional dynamic types operating on the E-V Mechanophase principle. They utilize dual phase shifting diaphragms to produce a high degree of uni-directivity at all frequencies.

The CARDYNE models are designed for extremely accurate reproduction of music and speech. The directivity gives it unusual versatility in increasing the working distance from the user by reducing reverberation and acoustic feedback. High output provides an excellent signal-to-noise ratio for broadcasting studio pick-up.

My unit is in excellent physical condition externally, but I decided to open up the mike to make sure the insides were OK before wiring up the new cable. Two screws on the back loosened the rear of the case and two screws under that loosened the front cover.

Electro-Voice 726 Cardyne 1 Microphone, internal back view.

Electro-Voice 726 Cardyne 1 Microphone, internal back view.

The insides were clean and not corroded, but all of the rubber shock-mount material had hardened and some of it turned to powder. Since the cartridge assembly just flopping around inside the case, I needed to replace all of the shock-mount material.

This microphone achieves its cardioid directionality by means of a resonance chamber that is part of the dynamic cartridge assembly. This assembly rests against a block of sponge rubber that is about ½ in. thick, 1 inch high, and two inches long. I was easily able to cut a replacement piece from a piece of ½ rubber that I had and glued it into place. There were a couple of bumpers on the front of the cartridge assembly that rested against the front of the case. These I replaced with pieces of self-adhesive rubber that I cut from a sheet that I bought from a craft store.

The shock mounts that held the back of the resonator to the mike frame were not as simple. What I needed were eight ½ inch diameter rubber washers, ¼ inch thick, with a ¼ inch hole in the center. I used a hole punch to punch the ½ circles out of a sheet of rubber, and then punched a ¼ inch hole in each one of those. These were close enough in size that I was able to re-assemble the shock mounts with the new rubber pieces, tighten the screws, and verify that is worked properly.

Electro-Voice 726 Cardyne 1 Microphone, internal front view.

Electro-Voice 726 Cardyne 1 Microphone, internal front view.

I double-checked the wiring inside of the mike to make sure that I hadn’t broken any wires, and then put the mike back together.  I didn’t have any silk or thin foam to replace the windscreen inside the shell, but it was in fairly good shape, so I’ll save that for a later date.  I then used my Dremel tool with a brass brush to remove oxidation from the exterior of the mike, and it cleaned up nicely.

I wired up a new cable for the mike to go from the Amphenol connector on the mike to a standard male XLR connector. I set the impedance switch on the back of the mike to “Low” and plugged the mike in. It worked.

Amphenol MS-3 connectors.

Amphenol MS-3 connectors.

Then, into the studio for some comparative recordings between this E-V mike and the Shure 556. The E-V is brighter and has a higher output than the Shure. Both mikes seem to have a significant amount of distortion. I am guessing that the capsules in both mikes are showing their age and may have some damage. Replacement capsules of the same type are not available. I could upgrade to a newer capsule, but then they would no longer be vintage mikes.

So, I’ll just be on the lookout for NOS capsules on eBay. There was a NOS capsule for a Shure 55S on eBay this week, but the mounting is entirely different that the 556, so I passed on it even though it is probably the same capsule. These mikes will be mostly for decoration, except for that occasional funky recording project that pops up now and then.

What is interesting is the amount of mechanical apparatus that was needed back in the 40s to create a directional mike. My new Electro-Voice N/D 468 microphones provide hyper-cardioid directionality and great sound in a package that has probably 1/8 the size of the old 726. We’ve come a long way in the past 70 years!

View of internal wiring.
Internal view of the microphone showing the wiring of the impedance switch and the transformer.
Posted in Classic & Antique Microphones, Microphone Teardown & Repair | Tagged Dynamic Microphone, Electro-Voice, Microphone

Condenser Microphone Mods

StudioMicZone

Studio Projects C1 and C3 Microphones with new capsule and mod kit.
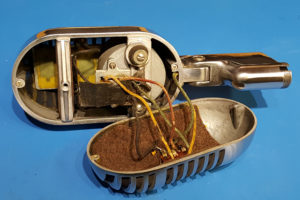
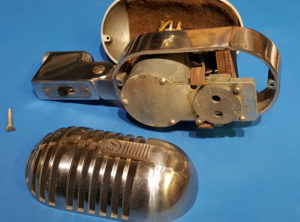
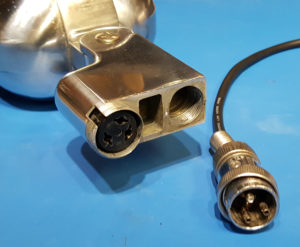
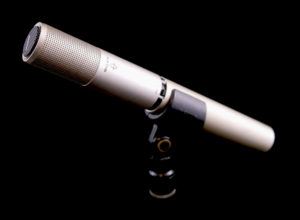
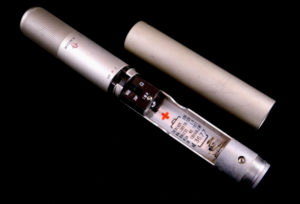
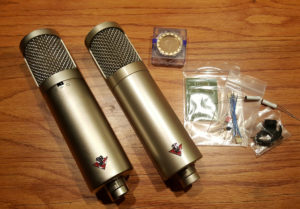
It’s amazing the number of small manufacturers creating great microphones. It’s good to have a “palette” of different sounding microphones to record with, and the large number of companies building quality microphones and providing modification kits and services makes it easier to build a diverse microphone collection.

I’ve acquired Studio Projects C1 and C3 microphones as these microphones have outstanding electronics. Both the “B” and “C” series Studio Projects microphones use a transformerless circuit based on the Schoeps design. Brent Casey of PMI adapted the design and it is built with quality components. Some find the microphone a little too bright and there are a couple of solutions.

I have upgraded the circuit in the C1 with an upgrade kit from microphone-parts.com.  This mod kit provides an adjustable high-frequency roll-off to tame the brightness of the microphone. If you have never modified a microphone before, this kit is a good place to start because it is very simple, and the C1 and C3 microphones are large and easy to work on.

Another way to reduce the high-end on the mike is to replace the capsule with a darker capsule like the MicParts RK-47. With this capsule, the EQ kit isn’t necessary. I replaced the capsule in the C3 with an RK-47 capsule. I’m looking for another C3 that I will modify with the circuit upgrade kit and install an RK-12, AKG style capsule. I used these mikes on a brass section and they sounded great. I can’t wait to try them out on other sources including vocals.

Posted in Microphone Modifications | Tagged Condenser Microphone, Microphone, Microphone Mods, Studio Projects

Sony ECM-22P Microphone

StudioMicZone

Sony ECM-22P Microphone

Sony ECM-22P Microphone

When I started in the recording business in 1973, my work was primarily live concert recording for schools and churches. My location setup was a Teac 7030 2-track reel-to-reel recorder, a Shure M-688 stereo mixer, and two Sony ECM-22P Electret condenser microphones.

Sony’s ECM series of electret microphones were a game-changing innovation in condenser microphones when they were first introduced in 1968. First of all, the electret capsule in the microphone did not require a separate bias voltage. Electret technology allowed a permanent electrical charge to be applied to either the diaphragm or the backplate of the microphone capsule, similar to the way a permanent magnet is magnetized, except in this case it is an electrical field rather than a magnetic field.

Elimination of this need for external bias meant that there was less circuitry inside the microphone and no external bias power supply was required. Phantom power had only made its way into microphone technology a few years prior, so most condenser microphones still had an external power supply.

The other innovation was the use of a JFET transistor amplifier for the electret capsule. Solid state circuitry was only introduced into condenser microphones a few years before this, so many condenser microphones still required heavy, bulky power supplies for their vacuum tube amplifiers. In fact, the Neumann U-87 solid state microphone was released in 1972.

So the ECM-22P was a real innovation and quite revolutionary. It brought the cost of a quality condenser microphone within reach of the small and home studio owner and was one of the products that helped fuel the home recording revolution. I paid about $100 each for the pair of microphones at that time.

Sony ECM-22P Microphone Internal View

Sony ECM-22P Microphone Internal View

This mike was powered by an Eveready 206 9V battery which was expensive and hard to find, or from phantom power. I didn’t have a phantom powered mixer at the time, and there were few, if any, available. If you forgot to turn the switch on the mike off, it was likely the battery would be drained the next time you needed to use it.

The circuitry in the microphone was very simple with a single JFET driving an output transformer with a switchable 600 or 250-ohm output. The power switch had three positions, Off, Music, and Voice. The voice position engaged a low-frequency roll off filter.

The ECM-22P is a cardioid microphone with a rated frequency response of 40-15,000 kHz. The signal-to-noise ratio was 66 dB, which is quite noisy by today’s standards, but a little better than the signal-to-noise of a reel-to-reel recorder running at 15 ips. with high-bias mastering tape. So the mikes performed well for me for some years.

I bought another pair of the microphones when I moved from my home studio into a commercial space in 1976. I still have all four of them, and they all still work even though I don’t use them anymore. I eventually replaced them in the early 1980’s with Shure SM-81 microphones which still get a lot of use today.


Posted in Classic & Antique Microphones | Tagged ECM-22P, Electret, Microphone, Sony

Visit us on:

Search

Categories

  • Audio For Video
  • Audio Fundamentals
  • Choosing & Buying Microphones
  • Classic & Antique Microphones
  • Hints and Tips
  • Microphone Accessories
  • Microphone Fundamentals
  • Microphone Modifications
  • Microphone Reviews
  • Microphone Teardown & Repair
  • Miking Techniques and Recording
  • Mixing
  • Monitoring and Listening
  • Other
  • Podcasting
  • Software
  • Studio Construction

Archives

  • March 2020
  • February 2020
  • January 2020
  • December 2019
  • November 2019
  • October 2019
  • September 2019
  • August 2019
  • July 2019
  • June 2019
  • May 2019
  • April 2019
  • March 2019
  • February 2019
  • January 2019
  • December 2018
  • October 2018
  • August 2018
  • June 2018
  • April 2018
  • February 2018
  • December 2017
  • November 2017
  • September 2017
  • January 2017
  • December 2016
  • November 2016
  • October 2016
  • August 2016
  • July 2016
  • June 2016
  • May 2016
  • February 2016
  • January 2016
  • December 2015
  • November 2015
  • October 2015
  • September 2015
  • August 2015
  • July 2015
  • June 2015
  • May 2015
Copyright © 2025 by Norwest Communications Inc. All Rights Reserved. - Weaver Xtreme Theme
↑