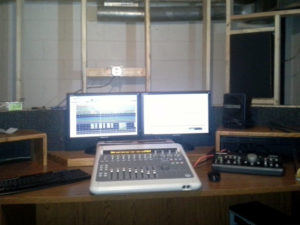
Console and controls installation on the desk.
Now that we had completed the installation of the desks, I wanted to get some equipment installed so that I could monitor what the room sounded like as we moved ahead with sound treatment. Although I had an idea of the way I wanted to do sound treatment, I’m not an acoustic designer and did not do any mathematical modeling of the room. The room is too small for proper design, but I believe I can still end up with a good sounding room. I know it will be deficient at the far bottom end of the audio spectrum, but most home systems will be far worse, and I can deal with that limitation.
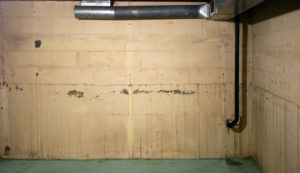
My goals are a listening space that sounds good overall, with proper stereo imaging and somewhat constant low-end response at different points in the room. My previous room worked at the sweet spot right behind the console, but the sound anywhere else in the room was a crap-shoot, and there was massive low-end buildup in front of the console and near the back wall. I wanted to try to avoid that here.
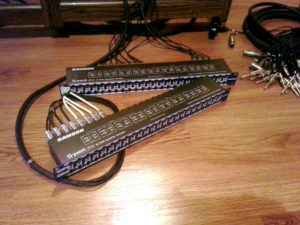
Patch panel installation in process.
The first order of business was to set the speakers in place and run the wires to them. Then we set the two racks in place, screwed them together and began running the wires from the DigiDesigns 003 console and the Mackie BigKnob monitor controller to the patch panels. The racks are on casters, and I am making sure to leave enough extra cable so I can quickly pull the rack out from the wall and access the equipment from the back.
In the old studio, the racks were permanently mounted to the wall with no access from the back. If I wanted to make any wiring changes, especially to the patch panels, I needed to remove then from the rack and make the changes from the front. This was a real pain, and each time I did it, I ran the risk of unplugging cables from another patch panel. I won’t make this mistake again and will always install racks so that there is good rear access.
I installed the computer beneath the desk, I terminated the network cabled in wall mount boxes with RJ45 Cat5e jacks and plugged in the computer and made sure it connected to the network and the Internet. I then connected the Digi003 console to the computer and made sure that it was working with ProTools. I wired the remaining necessary equipment to the patch panels, fired up ProTools, and was able to play some music and verify that everything worked. The room was boomy, and imaging was non-existent, but that’s what I expected since there was no sound treatment on any of the walls yet.
The next job was to run the mike snake with 12 mike inputs through the ceiling into the recording space and hook it into the patch panel. After that, I ran the lines for the headphone monitors to a terminal block in the ceiling above the rack. A cable to the patch panel was then run up the wall and connections were made to the terminal block.
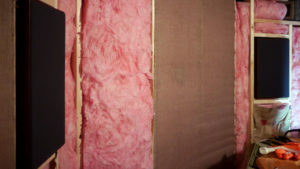
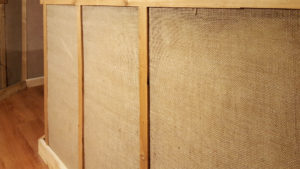
Insulation and burlap installation on the front wall of the Control Room.
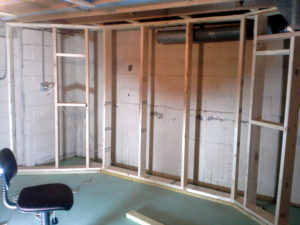
Now that I had tested the equipment, we installed 8 inches of insulation in the front wall. In the corners of the front of the room behind the angled corner walls and speakers, we filled the space with insulation, probably almost 24″ deep at the corners. This was effectively a bass trap in each of the front corners. We then covered the front wall with burlap to protect the insulation.
The sound of the room improved considerably with the bass trapping in the corners and insulation in the front wall. The low end was tight and fairly even across the room, much better than I had expected at this point.
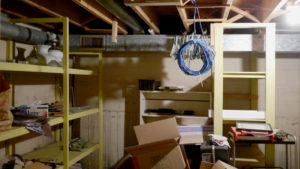
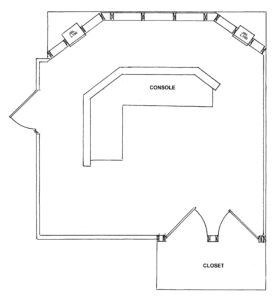
Finally, to complete this phase of the project, we installed two pre-hung doors into the back wall of the room to close up the closet.
 We started the process knowing that there were going to be compromises due to the spaces available, budget and time. Here’s what I had to work with:
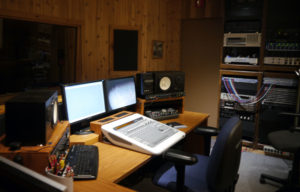
 Budgets for a large well-designed and equipped commercial recording studio can easily exceed a million dollars. Most of us building a home or small commercial studio have budgets in the range of a few thousand dollars or less. It is possible to put together a studio that will produce good or even outstanding recordings on this type of budget, but it will require a lot of compromises.