 We started the process knowing that there were going to be compromises due to the spaces available, budget and time. Here’s what I had to work with:
An unfinished storage room in the basement, approximately 14X15 feet, to be converted to an audio control room. Unfortunately, the room sits below a sunken living room, so the ceiling height is a little over seven feet. Fortunately, I am not a tall person.
The storage room sits at the end of a finished Rec Room which we will use for the recording space. The layout is such that a large window from the control room to the recording studio is not a possibility.
On the positive side, my house sits on a large lot in a relatively quiet suburban neighborhood. The construction is a brick veneer, and the walls are plaster instead of drywall meaning the house is well isolated from outside noise. The nearest train tracks are a mile away, and even though we are sometimes on the flight path in and out of Chicago’s O’Hare airport, planes are not audible in the basement. My kids are married and out of the house and my wife works during the day, so the house is very quiet other than the usual appliance sounds.
The first compromise, of course, were the small existing spaces with which we had to work. Next, was that the Yahama Grand Piano from the former studio wouldn’t fit. Thirdly, clients would have to walk through the house to get to the basement. My intent was to have a good room for mastering and mixing and to have limited recording ability, mostly for overdubs, using the far end of the existing rec room for a studio. The acoustics in the rec room were acceptable for close miking, with bookshelves, furniture and room shape providing diffusion and absorption. So, what we decided is to build a comfortable, good sounding control room and use the rec room “as-is” for a studio, using gobos if needed to control reflections and provide isolation. I would run mike and headphone lines permanently into the room. We decided to install a door with mostly glass in the control room to allow a limited view of the rec room. We could do any sound treatment needed in the rec room at a later date. There was one more requirement; the Rec Room still needed to function as a Rec Room. Fortunately, it only gets used only around the holidays and a little bit in the winter. We entertain on the deck or screen-in porch the rest of the year so the space could stay in recording studio mode.
Thus, we decided that the construction effort would go into building a great sounding control room. Being able to hear correctly is essential to producing good mixes. If the acoustics are flawed, it is likely that all of your mixes will reflect those flaws. Mixing through headphones is possible but very fatiguing, and the fact that just about all major recording projects are mixed on speakers is a testament to how important this is.
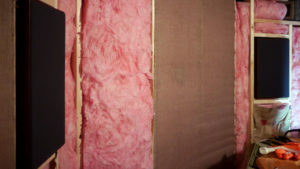
For the room we chose, really the only space available, I was concerned about the low ceiling. But this room was better shaped than my former control room, which was wide and not very deep and a few square feet larger. Other potential problems were that the water pipe from my well ran through the room and made some noise each time the well kicked on. Also, the furnace room was behind this room, but we would have a closet and concrete block wall between the two rooms which would eliminate most of the sound from the furnace. A heating duct ran through the room also, but I figured that could be insulated and deadened. Also during the recording process, it would be necessary to shut off the heating or A/C, which I also did at the old studio.
One of the problems in the past with shutting off the air conditioning was that in a studio lit by almost 20 PAR30 incandescent floodlights, the room got very hot, very quickly. We decided to illuminate the new space with all LED lighting, which produces very little heat.
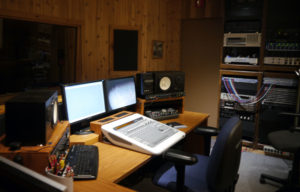
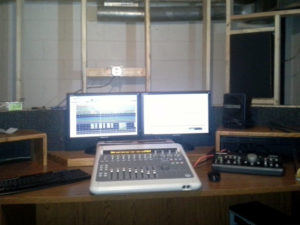
Old Control Room. We’ll take the table holding the equipment, the JBL speakers and two of the equipment racks.
We decided to move the equipment desks from the old studio since they were quite functional and in good shape. They were surrounded by a 4-inch deep sound-absorbing partition, or half-wall, which we would also move and bolt to the floor in the new space.
We had four 19″ equipment racks that were about four feet tall. We decided to keep only two of them since our need for outboard equipment was minimal since making the move to ProTools.
I also decided to keep the JBL L100 monitors that I had been mixing on for the past 40 years. They were in good shape, and I know how music should sound on them, so I didn’t want to have to deal with different sounding monitors.
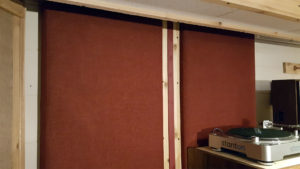
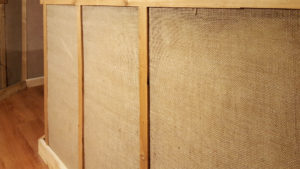
Also, for the design of the room, I decided that since we didn’t have a Control Room window, I would make the front of the room absorptive and the back reflective. I read a lot of good things about that type of design so I thought it would be a good choice, especially in a small room. For the best sound, I wanted the room to be symmetrical from left to right with the speakers equally positioned around the center axis of the room and the listening position along the center axis.
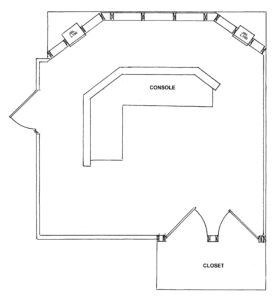
New Control Room Layout
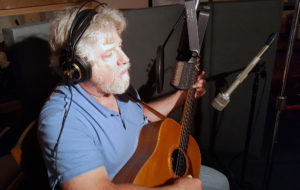
So with these major decisions and compromises made, I called my friend and client Lee Murdock. Lee is an excellent carpenter in addition to his legendary music abilities. He had helped considerably with the remodeling of my former studio over 20 years ago, and I have also recorded 19 albums for him. Because of that, he knew the needs of the space quite well and agreed to assist with the design and construction of the new room. Since he’ll hopefully be recording his 20th album here, he has a vested interest in creating a comfortable and workable space. Lee has an uncanny ability to ask the right and sometimes difficult questions and play devil’s advocate when necessary. That kind of collaboration is synergetic and produces a better product.
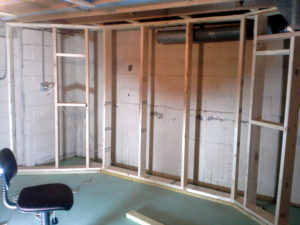
After a bunch of discussions and measurements, Lee drew up a plan and we began mapping out the construction process. Not counting the closet, the room is approximately 14 ft. by 15 ft. Not shown on the plan are two movable equipment racks to the right of the console desk.
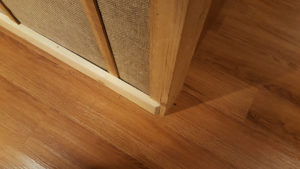
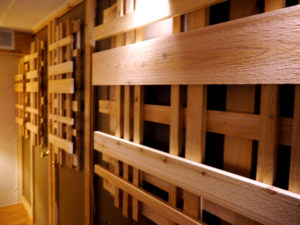
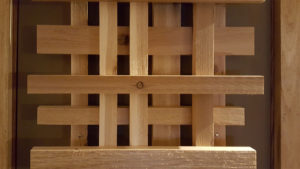
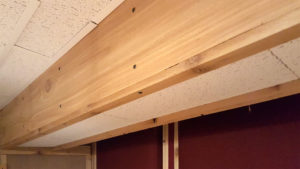
The biggest uncertainty in my mind was what to do with the ceiling. It was currently uncovered with just open joists. I considered maybe just putting some acoustical foam absorbers on the sub-floor and leaving the joists open to maximize the height of the room but decided to postpone this decision until later and see how the room sounded before determining the ceiling type. I also knew that I would need some type of diffusers on the back wall, but didn’t know specifically what kind.
(Continue to Home Studio – Part 3)


 I was aware of the possibility that I would occasionally have a problem with recording due to external noise that was beyond my control. It could be a lawnmower, chainsaw or any of a variety of outdoor tools and appliances, and it could happen at any time. I hadn’t had an opportunity to gauge the amount of threat that existed. Until last week.
 So, I’ve finally finished my great sounding new studio. Now what? It’s time for calibrating my ears to the new room. I did this periodically in my old space, particularly after changes in equipment and any upgrades to the structure or sound treatment. And maybe most importantly, before beginning the mixing of any new album.

 he pipe from the well. Every time the well turned off, the pipe would bang, it also radiated some noise when the well was running. I wrapped the pipe in sound deadening material and added a couple of pipe hangers to make sure it was well supported. I found that the pipe was banging against another pipe in the furnace room, and by supporting both pipes properly, I solved that problem. Finally, I sealed the space around the water pipe and furnace duct where they went through the wall into the control room with spray foam. That cut down on a lot of noise. If the room is quiet, it is still very audible when the well turns on, but if music is playing, the sound isn’t noticeable.