↓
 

StudioMicZone

Microphones and Recording Techniques for Small and Home Studios.

Studio Mic Zone - Microphone and recording techniques for small and home studios.
  • Home
  • Terms of Use
  • Privacy
  • Contact Us
  • About StudioMicZone
  • About the Blogger

Category Archives: Miking Techniques and Recording

Proper use of microphones. Techniques for miking specific sources.

Post navigation

Newer posts →

Are You Capturing Or Creating?

StudioMicZone
Two stereo pairs and one stereo mic set up to do fail-safe recording of a choir concert.

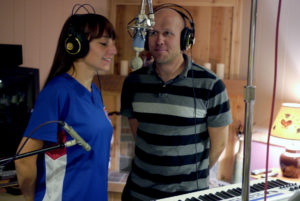
Before you set out to do a recording, it is a good idea to determine what your objective is. Are you capturing a performance, or are you creating a recording that didn’t happen in a single time or place?

Back in the 1950’s when stereo high fidelity recordings and equipment became available, the ultimate purpose was to re-create the concert experience in your living room. Engineers of that period made their recordings with a stereo pair of microphones and spent significant time positioning the microphones, but did little post-processing.

After Les Paul’s experiments with overdubbing and multi-track tape recorders, multi-track recording became the norm in many studios, where pieces of the same performance would be recorded at different times and possibly in different places.

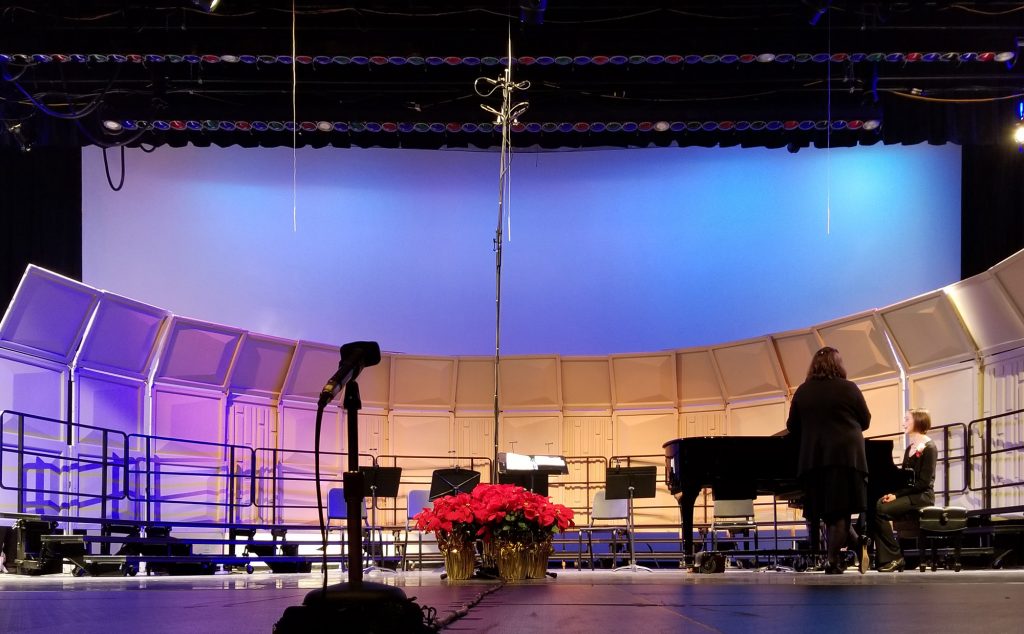
If you are capturing a live performance in the studio or on-location, the equipment, techniques, and microphones used may be very different than a multi-track, highly produced recording. In capturing a live performance, the acoustics of the recording space may be an essential factor.

If your goal for your studio is only to capture live performances, your equipment list and choice of microphones is very different from that used “in-studio.” And if you are doing both types of recording, your location list of equipment is different from your list of equipment in the studio. You’ll need a portable recorder, long microphone cables or a snake, one or more very tall microphone stands and a stereo microphone or pair of SDCs and a stereo microphone mount to put them both on a single stand in the proper configuration.

Recordists usually don’t choose LDC microphones for concert recording for multiple reasons. They are difficult to support on a tall stand, and they tend to have a “colored” response, which might be useful in the studio, but not for a whole orchestra or choir. The usual microphones used are a pair of SDC microphones or a stereo microphone of some type. In some cases, a pair of bidirectional microphones (possibly ribbon) in Blumlein configuration or possibly an M-S pair will be used. Microphones with a flat frequency response are the norm.

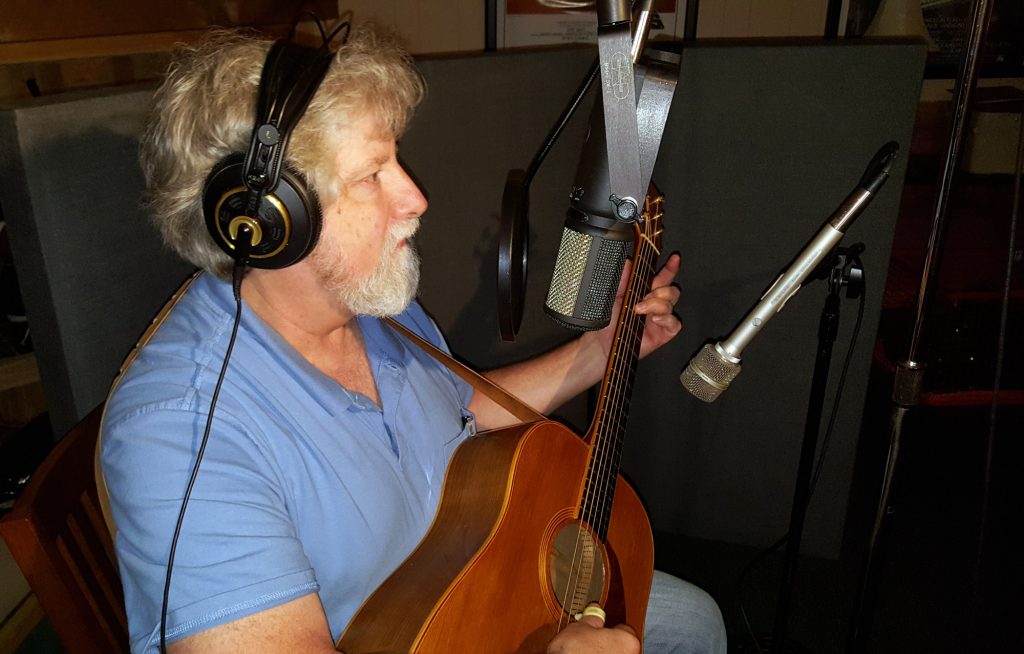
I’ve seen jazz recordings done with a single, ribbon, figure-8 microphone like an RCA 44 with the musicians arranged around the front and back of the microphone to achieve a proper balance. This retro configuration emulates the way studios recorded jazz groups in the 1940s and 1950s.

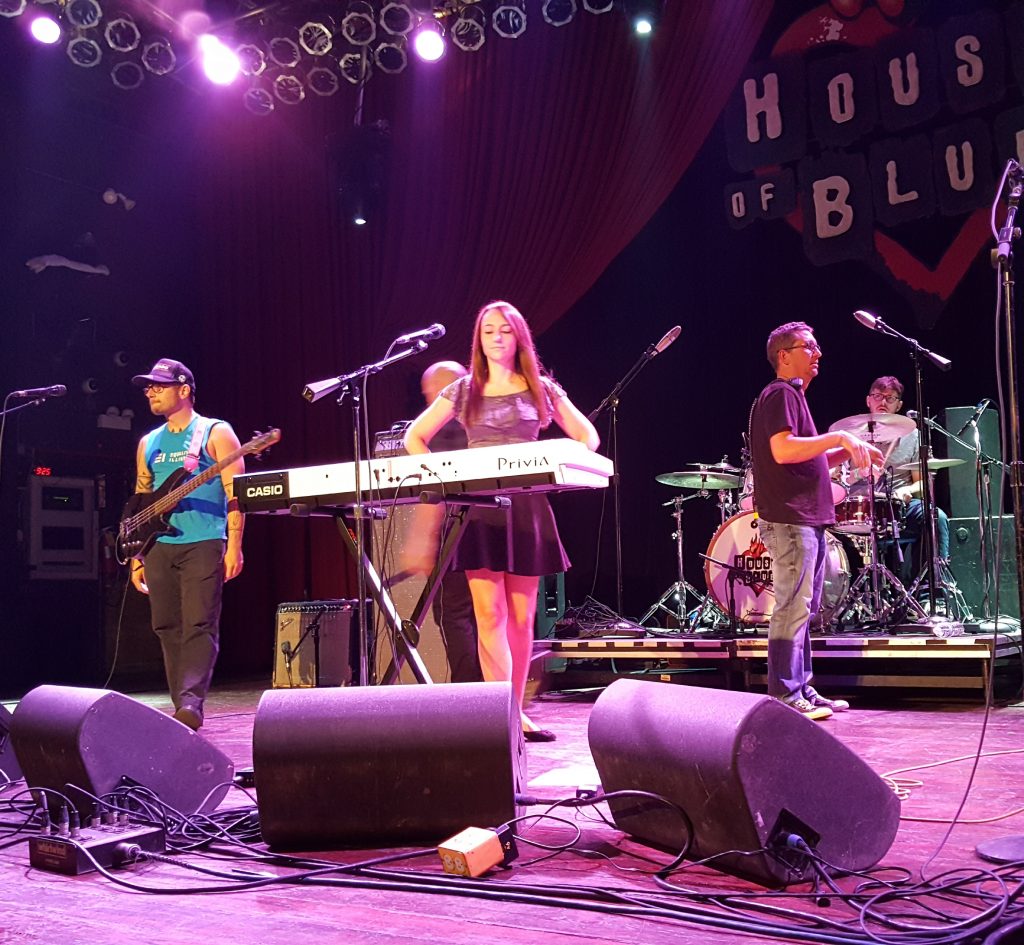
If you are capturing a live performance of a rock band and close miking every instrument, the techniques and equipment are similar to a studio produced multi-track recording, other than that you will be carrying a large amount of equipment.

Part of the technique is the positioning of the microphones and musicians to achieve a proper balance. This type of recording usually involves a bit of pre-planning, because once the performance happens, it’s nearly impossible to change the balance between each of the different musical sections. Often, choir concert and orchestra directors set the group up configured for convenience or visual appeal and not a good sound.

Posted in Miking Techniques and Recording

Even The Jackals Album Finished

StudioMicZone
Even the Jackals new album, Sink or Float

Almost a year in progress, the Even the Jackals album, Sink Or Float, was finished this week and released at the House of Blues in Chicago on September 28. Congratulations to Danielle, Bill, Seth and Tommy on a job well done. This album was the ultimate test of the new studio and the new space performed beyond all expectations. It was a long project and worth every minute of time that we put into it. It also makes me happy to know that every minute of construction put into the new studio paid off well, also.

Even the Jackals at House of Blues September 28, 2017

I am amazed at what can be accomplished in a home studio in a somewhat non-ideal space. I learned a lot in both the studio construction and in the production and recording of this album. thanks to the Jackals for having faith in me and for being part of this new adventure.

I’ll be sharing some of this knowledge in future blog posts. The opportunities for home recording are endless. Learn your craft and keep producing!

Posted in Miking Techniques and Recording, Other, Studio Construction

Loving Light

StudioMicZone

The first start-to-finish project in the new studio was Lee Murdock’s 20th album Loving Light. One of the reasons that I decided to build a studio at home was to be able to continue to work on his projects. Since he had provided much of the carpentry skills for my other studio and was providing much of the planning and carpentry skills on the new space we made sure that the new space would meet the needs of his album production. We were not disappointed with how well the process went for Loving Light.

We followed our usual process of recording. Lee singing into an Equitek E200 while playing guitar and miking the guitar with a pair of Shure SM-81s, one above the 12th fret and the other below the soundhole and near the bottom outside edge of the guitar. We don’t use a click track. We will usually record the bass and possibly another backing instrument at the same time. Drums are overdubbed, as are additional instruments and background vocals and any percussion.

Lee Murdock during Loving Light session.

Lee and I work together on the mix. We use light EQ and compression as necessary. Sometimes there will be minor editing and punch-ins if necessary. Since Lee sings and plays at the same time, which is an important part of his “sound,” he will need to both sing and play for any guitar or vocal fixes. We use two or three different reverbs as necessary. Lee’s trademark sound is clean and unprocessed, so we don’t add any distortion or analog processing.

Since we have worked together on the mixes and listened to them on multiple sets of speakers as the mixes are finalized, mastering is simple. Sound Forge is my mastering tool. I clean up the head-end of the song and do the final fade on the ending. Then I will do usually between 3 dB and 6 dB of peak limiting using the Wave Hammer plug-in with compression turned off. I set the amount by visually looking at the peaks. I have learned this from years of experience and do just enough so that the effect is not audible. Then I load the album into CD Architect and set the song order and spacing. Then I balance the levels of the songs by matching the vocal levels. At this point, we are rarely making more than 1 dB to 2 dB adjustment to the song levels. Then I add the CD text to the file and burn a couple of CDs. We both give them a listen in the car, and on home systems. I’ll make any minor changes after that and burn the final masters.

We are both extremely happy with the final album and how well the process went. The album will be released in November. Available at leemurdock.com.

Posted in Miking Techniques and Recording, Other, Studio Construction

The Three-To-One Ratio Rule

StudioMicZone

There are a few rules-of-thumb in recording that are useful and time-saving. The three-two-one ratio rule is one of those that will assist you when you are setting up a recording session for multiple musicians, and it’s just as useful if you are miking a live concert.

One of the essential books for understanding microphones is Microphones: Design and Application, a 1974 book written by Lou Burroughs, one of the founders of Electro-Voice. This book is an excellent course in the basics of microphone usage, both in sound reinforcement recording.

One of the principles developed by Burroughs was the three-to-one ratio rule.

This rule is an empirical rule determined by listening tests for microphone placement and sets a minimum distance between microphones to avoid degradation in the sound from a given source. So, it is the minimum distance between microphones to keep noticeable bleed-through and phase problems under control.

The rule is: The distance between any two microphones must be at least three times as great as the distance between the microphone and the source of sound which it is to pick up.

So, for example, if you are miking a violinist and a cellist and the microphones are 2 feet away from their instruments, the microphones should be separated by a minimum of about 6 feet.  I also believe that the rule implies that the sources will be of similar volume levels. Recording a screaming guitar amp in the same room with a quiet acoustic guitar is probably not going to work.

Remember, this is a guideline, not a precise law. But, keeping this in mind should make setup for sessions easier and help you avoid bleed-through and phasing problems between microphones.

Posted in Microphone Fundamentals, Miking Techniques and Recording

External Noise Evaluation

StudioMicZone

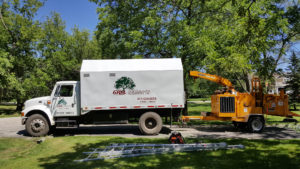
I was aware of the possibility that I would occasionally have a problem with recording due to external noise that was beyond my control. It could be a lawnmower, chainsaw or any of a variety of outdoor tools and appliances, and it could happen at any time. I hadn’t had an opportunity to gauge the amount of threat that existed. Until last week.

There were several large maples and a pear tree that were shading my garden so much that I soon wouldn’t have enough sunlight to grow vegetables, so I contracted to have the trees removed. The crew worked quickly and efficiently and once enough of the trees were down, it was time to grind up the branches.

They parked the large chipper in my driveway, which put it 15-20 feet from my basement control room. If you have never been near an operating wood chipper, they are one of the loudest mechanical devices you will ever encounter. This machine would be the ultimate test of sound isolation for my new studio.

Once the engine was going and they were grinding branches and limbs on a continuous basis, I headed for the basement. I sat in the control room with the chipper less than 20 feet away, and although audible, it would not have been disruptive to a recording or mixing session.

I went out to the studio and listened. If I listened really hard, it was just barely audible. I can’t think of any close-miking situation where the sound would have gotten into the recording. That was excellent news! I was convinced that no matter what is going on outside, recording or mixing wouldn’t be disturbed. After this, if any outdoor sounds disrupt a recording session, I know that I probably have a lot bigger problems than an interrupted session.

Posted in Miking Techniques and Recording, Monitoring and Listening, Studio Construction

Testing the Recording Space

StudioMicZone
Randy, all ready to play.

When I decided to move my studio home, I knew that I would be facing many compromises, the largest being that I would only be able to record a few musicians. I thought that drums might be a bit iffy and that any choir recording would be out. Nevertheless, Gary had a couple of projects in the works, one for Rory cooney and another for Tony Alonzo, so we decided to push the limits and see what we could get away with in my rec room.

The first gig was drums. Randy Carpenter came up from Louisianna to play drums on the album. We set up the drums and miked the set and just using the two overheads and the kick mike, an Audix D6, got a really nice sound. We miked the rest of the set and were extremely happy with what we heard. 

Looking over the music before the session.

A few days later we recorded the choir tracks for several albums. We have a 12 voice SATB choir. We gathered them around the four microphones, one for each section. We tried a couple of tracks and I was ecstatic. The sound was clean and uncluttered. There was sufficient separation between the microphones and everyone loved working in this space. They all thought they could hear better and all thought it was more comfortable to work in as compared to the old space. The parking was a lot better also!

So we are happy. The studio will be much more useful than I could have hoped for. I’ll still plan on doing some more tweaking with the sound treatment and with the arrangement of the room, but it is workable as it is.

Posted in Miking Techniques and Recording, Studio Construction

Home Studio (Part 7 of 8) – Thoughts On the Recording Space

StudioMicZone

Most of my effort has been spent building a new control room, and the plan has been to do limited recording in my rec room. There was just not the budget or space to construct a dedicated recording space. My initial though was that the room was quiet enough and acoustically agreeable for a close-miked recording of one or two people.

So, the only thing we really did was to do a bit or re-arranging of the furniture, and run a 12 channel mike snake into the room and run lines for headphone monitoring using an existing Q-Mix box.

Shooting a segment for The Style Academy with Noelle Cellini.

Shooting a segment for The Style Academy with Noelle Cellini.

Also, since I still do some video production, the room needed to stay adaptable for an occasional video shoot using a nine-foot paper background. We did our first video shoot in the space during the early stages of Control Room construction, and this gave me some insight into the sound of the room.

I shot a series of videos for Noelle Cellini of The Style Academy at my previous studio and continue to do that here in my new space. Noelle’s videos are focused on how to dress, and since she may wear several different outfits in the course of a video plus demonstrate accessories like scarves and necklaces, using a lavalier microphone would present a lot of problems. I typically use a RØDE NTG2 shotgun mike placed above and to her left or right, 3 to 4 feet away. I can hear a bit of room sound, but the recording is acceptable. There is just a little more room sound than the old studio, so I was encouraged that this space would work for music recording.

Recording with Lee Murdock

Recording with Lee Murdock

The first real recording test was with Lee Murdock. We didn’t have a lot of time, but I set him up as I usually do, seated, with two Shure SM-81 microphones on the guitar, one right above where the neck joins the body and a second one on the bottom of the guitar body opposite the neck. Then I set up a CAD Equitek E200 for his voice. We recorded a couple of songs, and the results were good with no noticeable coloration of the sound. It’s what I expected, but it was good to verify it. We were both happy since Lee has an album project to record next year.

Then with the Control Room partially complete, I started a project with Danielle and Bill from The Crickets Duo. We recorded Vocals, keyboard, acoustic and electric guitar and ukelele. Again the results were encouraging, with no coloration problems on any of the recordings.

The only thing I am doing acoustically in the room is to cover up the television and a barrister bookcase with blankets since they are highly reflective. I also unplug my wine cooler and turn off the heating and air conditioning while we are recording. As I stated in an earlier post, all of the lighting is LED, so the room doesn’t heat up too much when the A/C is off.

Recording with The Crickets Duo

Recording with The Crickets Duo

We plan on pushing the envelope a bit and seeing what is possible in the room. We have a drum recording session scheduled for the Spring, as well as a session with a choir. Look for a report on this in April or May.

So, when the control room is complete in the next month or so what are the plans for this room? We still use this room for entertaining during the Holidays and occasionally during the winter, so It needs to be easily transformable back into a rec room. And since I still do some video shoots down here it needs to be quickly convertible from a recording studio to a video studio and back.

Right now, this is the biggest problem as this transformation takes at least a couple of hours in each direction. My first effort will focus on cutting this time down. Better storage of lighting equipment will help. Also, I currently set up my paper backdrop on stands which is time-consuming. I’ll be looking into a way of hanging the rolls in the ceiling so the paper can be pulled down when needed and then rolled back up into the ceiling when done.

As far as acoustical treatment, I’d like to add some ATS absorptive panels to the walls as well as some diffusers, similar to what I built for the Control Room. I think stuffing the ceiling with fiberglass insulation above the dropped ceiling might even out the low-frequency response of the room and compensate for the low ceiling.

But, at this point, the room is working for what I need. Once I try recording drums and some larger vocal groups, we’ll have a better indication of what we need to do.

(Continue to Home Studio – Part 8)

Posted in Miking Techniques and Recording, Monitoring and Listening, Studio Construction | Tagged DIY Studio, Home Studio, Studio Construction

Post navigation

Newer posts →

Visit us on:

Search

Categories

  • Audio For Video
  • Audio Fundamentals
  • Choosing & Buying Microphones
  • Classic & Antique Microphones
  • Hints and Tips
  • Microphone Accessories
  • Microphone Fundamentals
  • Microphone Modifications
  • Microphone Reviews
  • Microphone Teardown & Repair
  • Miking Techniques and Recording
  • Mixing
  • Monitoring and Listening
  • Other
  • Podcasting
  • Software
  • Studio Construction

Archives

  • March 2020
  • February 2020
  • January 2020
  • December 2019
  • November 2019
  • October 2019
  • September 2019
  • August 2019
  • July 2019
  • June 2019
  • May 2019
  • April 2019
  • March 2019
  • February 2019
  • January 2019
  • December 2018
  • October 2018
  • August 2018
  • June 2018
  • April 2018
  • February 2018
  • December 2017
  • November 2017
  • September 2017
  • January 2017
  • December 2016
  • November 2016
  • October 2016
  • August 2016
  • July 2016
  • June 2016
  • May 2016
  • February 2016
  • January 2016
  • December 2015
  • November 2015
  • October 2015
  • September 2015
  • August 2015
  • July 2015
  • June 2015
  • May 2015
Copyright © 2025 by Norwest Communications Inc. All Rights Reserved. - Weaver Xtreme Theme
↑