Home Studio (Part 6 of 8) – More Testing and Diffusion

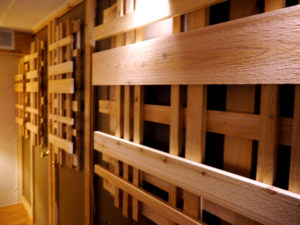
Cedar diffusion structures on the back wall.
Frequency response and evenness in the room are pretty good, but the stereo imaging is still not very good. I had been in a quandary as to what kind of diffusion I should put on the back wall and was not happy with the options I explored. I found some commercially available molded-plastic diffusers that weren’t overly expensive. They could be painted, but I wasn’t thrilled with the look. What I wanted was wood, but the pre-made diffusers were ridiculously expensive, and I wasn’t happy with the ideas I was having for making my own.
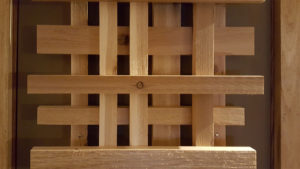
One night I was playing around with some leftover pieces of cedar that we had, and it hit me. I would make a four layer construction of cedar strips, so including the wall it was attached to, there would be five reflective layers or different depths to diffuse the sound. I played around with the idea on paper so that each layer would have approximately the same reflective surface area.

Close-up, four layer wood diffuser.
I quickly cut and screwed one together and was amazed how good it looked and how well it fit into the decor of the room. I found that if I built the layers in reverse order, I could put the screws in from the back and they wouldn’t be visible. I bought the wood the next day, and in one evening built the four diffusers, assembled with both glue and screws. I attached them to the back wall and closet doors and then did some listening.
It made a significant difference on the stereo imaging. The room sounded very nice, and the stereo imaging was tight. I was pleased with the result. The room sound was way better than I had hoped it would be.
I hadn’t added any diffusion to the right side wall, and I probably didn’t need much since that wall had the equipment racks, an Ampex tape recorder, and a cabinet with a lamp on top. But since there were a few feet of wall that was reflective, I added some strips of cedar with several different layers of thickness. It might have been more for looks than sound, but it looks great and adds a bit of diffusion on that wall.
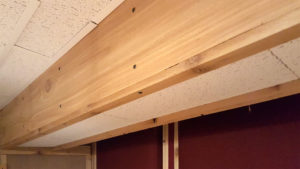
I also wrapped the heating duct in sound deadening material and then framed it in acoustical tile and cedar. I put sound deadening material behind the register that feeds air to the room. We had previously moved it from the front to the back of the room to keep the sound of the air as far away from the mixing position as possible.
One other item causing a problem was t he pipe from the well. Every time the well turned off, the pipe would bang, it also radiated some noise when the well was running. I wrapped the pipe in sound deadening material and added a couple of pipe hangers to make sure it was well supported. I found that the pipe was banging against another pipe in the furnace room, and by supporting both pipes properly, I solved that problem. Finally, I sealed the space around the water pipe and furnace duct where they went through the wall into the control room with spray foam. That cut down on a lot of noise. If the room is quiet, it is still very audible when the well turns on, but if music is playing, the sound isn’t noticeable.
Finally, I installed the last of the equipment in the rack. Nothing critical, but a couple of pieces I use once in a while like a turntable and a cassette player.
